

In a lumens vs candela flashlight comparison, lumens tell the buyer how much light leaves the flashlight; candela describe its intensity in a particular direction. Lux connect that beam to a surface at a distance. A sensible purchase brings all three into the buying brief, along with coverage, battery configuration and the period for which the light must remain useful.
The dilemma usually appears on a quotation sheet. One offer has a larger lumen number. Another has a longer advertised range. Both suppliers call their lights powerful, and neither column explains what the person using the product will see. The category buyer has to decide whether those differences support a retail claim, improve an equipment kit or merely make the specification look more impressive.
There is a more productive route through that comparison. Begin with the object being illuminated, establish the beam needed to cover it, then examine the conditions behind each performance number. Total output belongs in that process, but it cannot carry the decision alone. A bright, broad pool of light and a concentrated distant hotspot serve different purposes.
This guide follows the decision from an initial purchasing brief to a sample approval record. It includes two current Brightenlux catalog examples, a worked calculation and a specification matrix that can travel with an RFQ.
Write the buying brief around an object, an area and a distance
“A bright flashlight for maintenance” leaves too much room for interpretation. Maintenance can involve reading a label inside an equipment cabinet, checking a pipe run above a ceiling or observing an object across a yard. A supplier responding to that description has little basis for choosing between broad illumination and concentrated reach.
The brief becomes useful when it names the task. Identify the object, describe the relevant detail and give the normal viewing distance. Add the dimensions of the area that needs light. Reading one label calls for a different beam from checking several connectors spread across a panel, even if the flashlight sits at the same distance from both.
Separate the usual task from the occasional one. A tool-kit flashlight may spend most of its time close to equipment yet occasionally be used to find something farther away. Choosing solely for the longest distance can saddle everyday users with a small, intense hotspot. Choosing solely for close coverage can leave the occasional search requirement unanswered.
Consider a hypothetical equipment-kit brief: the primary job is examining a panel at about 1.5 metres; an occasional secondary job is locating an object at 30 metres. Those distances are an illustration of how to write a brief, not a recommendation. The buyer still has to establish the target dimensions, viewing conditions and illumination needed for each job. The supplier can then propose a fixed beam, an adjustable beam or separate products and explain the compromise.
Duration is another part of the task. A thirty-second look at a component differs from keeping it illuminated throughout a work session. In the first case, an elevated mode might have a useful role. In the second, the relevant evidence is illumination after the light has warmed and while the session continues. A maximum at activation says little about that later period.
The target deserves as much attention as the flashlight. A pale wall makes an easy demonstration surface; a dark cable bundle or reflective nameplate may expose problems that the wall hides. Include representative surfaces in the sample trial. Their role is to reveal glare, contrast and practical readability, not to redefine the flashlight’s laboratory lumen figure.
For coverage, dimensions are better than adjectives. A request for a “wide beam” leaves the supplier guessing whether the user wants to see a doorway, a vehicle compartment or the full width of a cabinet. A sketch with the flashlight position, target plane and required area is often enough to clarify the discussion. Mark the positions where poor illumination would prevent the task from being completed.
Finish the brief with a clear distinction between requirements and preferences. Required geometry, power arrangement and operating period form the comparison baseline. Grip, control feel and preferred beam appearance can be recorded during the user trial. This distinction makes a supplier’s response easier to assess: a deviation from a minimum is a technical issue, while a preference may leave room for a better commercial option.
A practical lumens vs candela flashlight comparison
Three quantities account for most of the confusion. Luminous flux is the light emitted by the source as a whole. Luminous intensity concerns the light directed into a particular direction. Illuminance concerns the light arriving on a surface. NIST’s photometric calibration publication distinguishes these quantities and their units. The BIPM definition of candela makes the directional nature of luminous intensity explicit.
| Metric | What it describes | Procurement use | What the value does not establish |
|---|---|---|---|
| Lumens, lm | Total luminous flux leaving the light | Compare the amount of emitted light on a matched measurement basis | Hotspot intensity, beam width, operating distance or sustained output |
| Candela, cd | Luminous intensity in a specified direction | Compare concentration toward a target; identify whether a number is peak beam intensity | Total flux, useful spill, uniformity or intensity in every other direction |
| Lux, lx | Illuminance arriving at a surface, equivalent to lumens per square metre | Specify the illumination to check at an application distance and target plane | The flashlight’s total output or a universal measure of task suitability |
| Beam distance, m | A distance defined using an illumination threshold and measurement convention | Compare stated reach when the basis is identified | A guarantee of reading, identifying or safely working at that distance |
For procurement, the table describes a sequence of questions. How much light does the product emit in the quoted setting? How is that light distributed? How much reaches the important parts of the target? A lumen figure answers the first question. It does not automatically answer the other two.
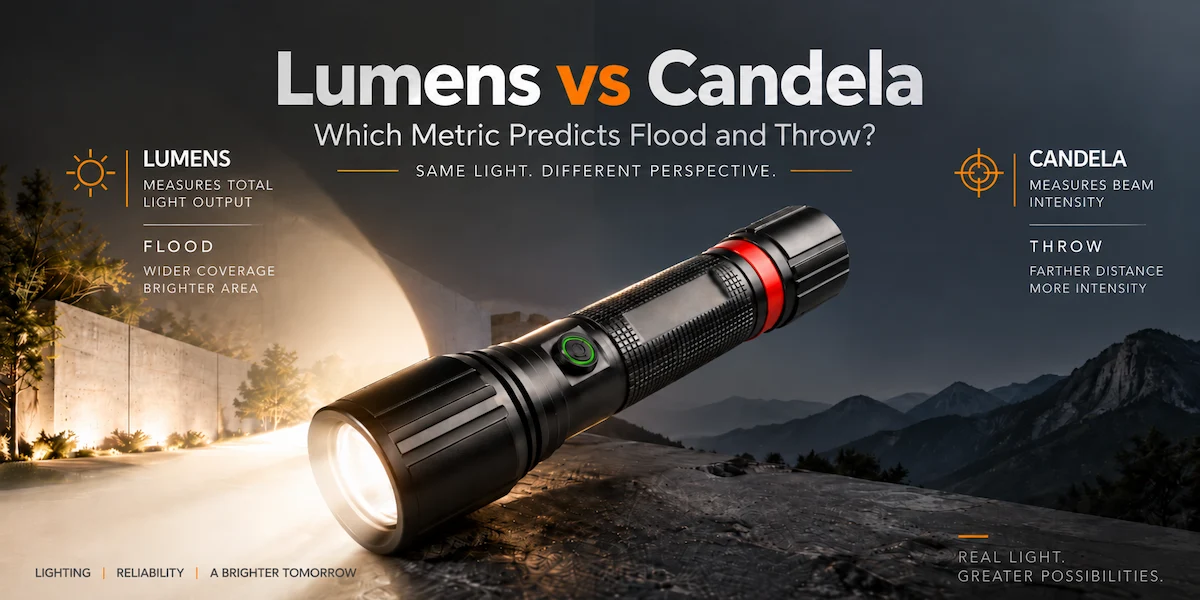
This is why two flashlights with similar lumen ratings can look very different in use. One might spread light broadly around the user. Another might concentrate more of its output in a central spot. The buyer needs to know whether the useful area is the hotspot, the surrounding spill or both. A large central reading is an incomplete answer when the target extends beyond it.
Peak candela has a specific scope. It describes the strongest direction of the beam, rather than a brightness level shared across the entire illuminated scene. A quotation giving peak intensity still needs coverage information if the application involves a wide target. Conversely, a broad-coverage requirement still needs enough intensity to put useful illumination on that target at the intended distance.
There is no single multiplier that converts a flashlight’s lumens into peak candela. That conversion requires knowledge of the angular light distribution. Without it, a calculated intensity is speculation dressed as a completed specification. The correct entry in a comparison sheet is “not supplied” until a defensible calculation or measurement is available.
Keep the flashlight brightness metrics in separate columns. The absence of one number should remain visible rather than being replaced by a rough estimate. This makes the next action clear: obtain the missing evidence, change the proposed claim or decide that the missing metric is irrelevant to the particular purchase. Completeness matters only when the filled fields mean something.
Calculate reach without confusing it with a usable working distance
Under suitable geometry, intensity connects to illumination through E = I / r². E is illuminance in lux, I is luminous intensity in candela in the relevant direction, and r is distance in metres. NIST describes the inverse-square relationship used to connect a photometer reading with source intensity and distance.
For the simplified calculation here, the source is effectively pointlike at the measurement distance, the detector faces the beam at normal incidence, and the path is unobstructed with no significant attenuation. The focus position, mode and measurement time remain fixed. Reflected light and uncontrolled ambient illumination are outside the direct-beam result.
These conditions make the formula useful for planning, not universal for every scene. A very close detector may be outside the appropriate far-field geometry. A tilted work surface receives light differently from a perpendicular detector. Fog, airborne dust, rain and obstructions can alter the light arriving at an object. The task trial has to account for the conditions that matter to the purchaser.
Two fictional profiles, compared on the same basis
Take profile A at 1,000 lumens and 10,000 candela, and profile B at 2,000 lumens and 5,000 candela. Assume the figures refer to the same mode and elapsed time for each profile. These are invented values for arithmetic; neither profile represents a Brightenlux model, a competitor or a measured sample.
| Illustrative quantity | Fictional profile A | Fictional profile B | Buying implication |
|---|---|---|---|
| Total luminous flux | 1,000 lm | 2,000 lm | B emits more total light in this example |
| Peak beam intensity | 10,000 cd | 5,000 cd | A concentrates more intensity in the peak direction |
| Calculated on-axis illumination at 50 m | 4 lx | 2 lx | A provides twice the central illumination under the stated assumptions |
| Calculated distance to 0.25 lx | 200 m | Approximately 141 m | The lower-lumen profile has the longer threshold distance |
| Calculated distance to a hypothetical 5 lx threshold | Approximately 44.7 m | Approximately 31.6 m | A different planning threshold gives a very different distance |
At 50 metres, A gives 10,000 divided by 2,500, or 4 lux. B gives 5,000 divided by 2,500, or 2 lux. The lower-lumen profile has the higher central illumination. That reversal is the reason a total-output ranking can mislead a buyer selecting for concentrated reach.
To find a distance for a selected illumination threshold, rearrange the equation to r = √(I / E). At 0.25 lux, A reaches 200 metres in the calculation and B reaches approximately 141 metres. Change the threshold to 5 lux and the calculated distances become approximately 44.7 and 31.6 metres. The 5-lux threshold is an arbitrary illustration, not a recommended minimum for any task.
A candela beam distance calculation tells the buyer something precise but limited: central illumination under the stated assumptions. It gives no illuminated width, spill pattern, colour information or duration. A may be preferable for a small distant target; B may serve a broad nearby area better. Neither conclusion is established by the table because the evidence needed for that application is absent.
The square relationship is also useful when weighing an upgrade. Doubling intensity increases the calculated distance by the square root of two, about 1.41, with an unchanged threshold. Doubling distance requires four times the intensity. A substantial change in a candela headline can therefore buy a less dramatic increase in range than a buyer initially expects.
Keep the input and the calculation attached to one another in the comparison file. A mathematically correct distance derived from an unsupported intensity is still unsupported. A verified intensity with a clearly chosen threshold produces a transparent planning result, but application acceptance remains a separate question.
Match flood and throw to the shape of the task
Flood and throw describe beam tendencies, not finished specifications. Their commercial value comes from the job they enable. A broad beam can make a large nearby area easier to inspect; concentrated intensity can put more light toward a distant point. The difficulty lies in choosing a useful balance rather than collecting both adjectives on a listing.
| Application brief | What to prioritise | Evidence to request | Tradeoff to evaluate with samples |
|---|---|---|---|
| Close equipment inspection over a defined area | Coverage and usable uniformity at the working plane | Illuminance readings across that area at the agreed distance and mode | Central glare, shadows and readability of representative labels |
| Occasional searching for a distant target | Intensity toward the target and usable beam width | Peak candela plus readings across the target area; identified focus position | Whether a narrow hotspot makes searching or tracking awkward |
| Movement followed by short inspection stops | Useful foreground spill and accessible operating modes | Beam pattern at near and normal distances; matched output timing | Peripheral visibility, reflected glare and mode selection with the intended gloves |
| Mixed near and far tasks with adjustable focus | Performance at both specified focus positions | Separate lumen, intensity and coverage information for the required positions | Adjustment speed, repeatability and whether either position compromises the main task |
| Continuous illumination of a fixed inspection point | Output after warm-up and through the required session | Time-series illumination at the target and an output curve for the quoted mode | Thermal comfort, charging or battery replacement workflow and usable duration |
For a broad target, the edges deserve attention. The centre may look excellent while a connector at the boundary remains difficult to see. Use a measurement grid suited to the target: centre and corners for a rectangular panel, or several positions along a narrow inspection path. The purpose of the grid is to answer the task, not to generate an elaborate chart with no acceptance rule.
A concentrated hotspot creates a different evaluation problem. It can illuminate a small object well yet require careful aiming during a search. Include the movement involved in finding and following the target. A fixed wall photograph cannot reveal whether the beam is convenient when the user is moving the light.
Spill also belongs in the discussion. It may help a user see the surroundings while looking toward a central target. In a reflective compartment, however, bright foreground surfaces can compete with the object being examined. Record these observations separately from the measured central intensity so the comparison preserves both kinds of information.
For an adjustable beam, performance figures need a position label. A supplier’s largest lumen value and largest intensity value may come from different settings. Combining them in a single row without that information encourages the buyer to imagine a performance combination that has not been established.
Specify the positions used in the application trial and a repeatable way to return to them. The optical result is only part of the assessment. Adjustment speed, control access and the likelihood that users will actually change the setting affect the value of the feature. If the main task requires frequent switching, the sample trial should include that switching.
Beam photographs help explain appearance, provided the comparison controls exposure, framing and scene conditions. Their strongest use is alongside measured readings and a task trial. Photography alone cannot establish peak candela or exact illumination over a target; different exposures can make two unequal beams look surprisingly similar.
Request a beam specification and sample matrix
Send the application, normal and maximum distances, target dimensions, preferred beam, output mode and duration, battery arrangement, quantity, market and timeline. Identify the sample evidence that would settle the choice.
Read the measurement window before reading the headline
A comparison changes when a number belongs to a brief elevated setting rather than the mode used through a work session. The unit may be identical and the underlying value may be genuine, yet the purchasing implication is different. The quotation needs to identify which operating condition the value represents.
PLATO’s public guidance for FL 1-2025 distinguishes ordinary modes from Short-Duration Elevated Brightness, or SDEB. Non-SDEB output, peak intensity and distance measurements occur from 30 seconds to two minutes after activation. SDEB measurements for those quantities occur from one to ten seconds.
The runtime definitions also differ. The ordinary-mode reference is output at 30 seconds, with the endpoint at 10 percent of that value. SDEB runtime starts at activation and ends at 90 percent of the maximum recorded in its one-to-ten-second measurement interval. A buyer comparing modes needs these distinctions on the report, not just an impressive maximum and a separate hour figure.
The conventional FL 1 beam-distance reference uses 0.25 lux, as explained in Streamlight’s official ANSI/PLATO presentation. It is a threshold convention for comparison, not a promise that every object is readable at that distance. The earlier arithmetic shows how much the selected threshold changes the calculated range.
Keep three fields apart: the standard-defined claim, the mode that supports it, and the illumination needed for the buyer’s task. A product can have an appropriately substantiated distance claim yet fail a particular inspection requirement. The mismatch concerns application fit; it does not necessarily mean the distance arithmetic is wrong.
Runtime requires similar care. A reported endpoint does not state that initial brightness remains constant until that time. The relevant procurement evidence is a curve or time-stamped readings showing when illumination falls below the agreed application requirement. This may be earlier than a standard runtime endpoint.
For an extended task, specify the portion of the operating period that matters. For occasional use, describe the pattern of activation rather than presenting continuous-operation evidence as a complete description of the workflow. These are different purchasing questions, and a supplier’s existing report may answer only one of them.
The full PLATO standard landing page was password protected during this editorial check. The discussion uses the linked public official guidance and formal manufacturer explanation; it is not a clause-by-clause review of the licensed standard. Projects using FL 1 performance markings need the applicable procedure and model-specific substantiation.
Two 1,500-lumen listings expose the questions a catalog cannot answer
Brightenlux lists two different platforms at 1,500 lumens. They are useful examples because the headline is shared while the optical and power arrangements differ. The comparison below uses the descriptions currently published on the official product pages; it does not present a controlled test between them.

| Publicly listed platform | Listed output and configuration | Procurement question opened by the listing | Evidence boundary |
|---|---|---|---|
| 1,500-lumen dual-power twist-zoom flashlight | 1,500 lm; one 18650 2,600 mAh included battery or four AAA batteries not included; C-to-C charging and power-bank function; twist zoom; hard-anodized aluminum and ABS | Which battery and zoom position will be supplied, and what output and beam data apply to that configuration? | The listed lumen value alone does not establish peak candela, substantiated reach or sustained illumination |
| 1,500-lumen SST40 21700 magnetic-tail flashlight | 1,500 lm; SST40; 21700 4,000 mAh battery; Type-C charging; hard-anodized aluminum and ABS; magnetic tail | What mode, time and method support the output and any distance claim, and does the magnetic placement suit the work area? | The page’s advertised distance is not treated here as a substantiated FL 1 result; no candela is inferred |
The twist-zoom listing points to a near-and-far discussion. Its battery alternatives introduce another decision: the buyer needs the proposed performance on the power arrangement actually supplied. A rechargeable configuration and a four-AAA option belong in separate evidence rows rather than sharing one assumed output and duration.
The SST40 platform opens a different discussion around the 21700 configuration and magnetic placement. The named emitter and battery capacity help identify the proposed build; they do not establish its illumination at the work surface. Mounting the light changes its position and orientation, so the application trial needs to reproduce that placement.
Body materials are useful configuration details, too. Both listings identify hard-anodized aluminum and ABS. Retain those statements in the purchasing record, while keeping them separate from conclusions about thermal behaviour, operating duration or durability that require their own evidence.
Neither selected description supplies the candela and full measurement conditions needed for a matched comparison. Advertised range therefore remains a field to clarify rather than an input to a newly invented intensity. Calculating candela backwards from the catalog distance would quietly assume a threshold and method the page has not established.
The About page identifies Ningbo Brightenlux Electric Appliance Co., Ltd. For this purchase, the valuable response is a confirmed product configuration and its evidence file. General company background cannot resolve whether a particular battery, focus position and output mode meet the application.
Make the evidence file match the item being quoted
The first check on a report is product identity. A credible measurement on a different battery option or optical revision may be of little use for the current quotation. Establish the sample, configuration and revision before judging the laboratory details or comparing decimal places.
| Required record | What the supplier should identify | Why the buyer needs it |
|---|---|---|
| Sample identity | Model, revision, sample identifier and configuration | Connect results to the sample and proposed order |
| Power and operation | Battery arrangement, start condition, output mode and focus position | Prevent comparison of incompatible operating conditions |
| Measurement basis | Method or standard edition, time after activation, environment and geometry | Establish what a claimed value actually represents |
| Output evidence | Measured flux and intensity where available, output curve and relevant illumination readings | Separate total output, concentration and useful duration |
| Instrumentation | Laboratory identity, instrument information, calibration basis and uncertainty where reported | Assess credibility and avoid overinterpreting small differences |
| Application checks | Target dimensions, measurement grid, distance, orientation and acceptance criteria | Connect laboratory information to the buyer’s actual task |
| Deviations and limits | Missing data, calculations rather than measurements, and departures from the requested procedure | Make uncertainty visible before sample or packaging approval |
A report needs enough detail to reproduce the meaning of its headline. For lumens, identify the operating condition and timing. For candela, identify the direction or confirm that the result is peak intensity. For a lux reading, distance and position are indispensable. Without those details, the buyer cannot tell which part of the intended task the number addresses.
Battery descriptions deserve particular attention. A cell size designation identifies a form factor, not a complete performance specification. The record should identify the battery arrangement used for testing and the arrangement proposed for supply. An optional configuration can remain in the quotation, but its results need their own basis.
The starting condition belongs in the same record. Fresh or fully charged batteries, selected mode and focus position affect what the test describes. If two suppliers present different conditions, retain both results but mark the comparison unresolved. The missing information may require a clarification rather than a new round of testing.
Instrument and calibration information help the buyer assess measurement credibility. So does reported uncertainty. Small numerical differences between results from different setups may be less meaningful than they appear on a spreadsheet. Avoid treating extra decimal places as evidence of a better product.
Traceability works in both directions. The performance file needs a sample identity, and the approved sample needs a link back to the report and quotation. A photograph, serial reference or agreed sample identifier can support that connection. What matters is that the purchasing team can later establish which configuration was approved.
Separate measurement from estimation. A derived threshold distance belongs with its measured intensity input and assumptions. A beam rendering or design estimate belongs in a planning field. Keeping these records distinct avoids the situation in which an early engineering estimate becomes a retail claim merely because it was copied into the latest spreadsheet.
A useful supplier reply can include an honest gap. “Not measured for the proposed configuration” tells procurement what remains to be done. The next decision may be to commission the measurement, narrow the claim or choose a different platform. Filling the gap with an unsupported number removes that decision from view without solving it.
Send one RFQ format and keep alternatives comparable
The buying brief and the evidence request should travel together. Otherwise, a supplier may send an attractive catalog specification while the procurement team is waiting for an answer about coverage after an operating period. One response matrix gives both parties a common view of the unresolved issues.
State the task first, followed by target geometry, operating period and power preference. Then identify the data required for the decision or planned packaging. A performance value that matters to an end-user claim deserves a documented basis; a feature that has no bearing on the task may remain a secondary catalog detail.
A reusable sample specification matrix
Complete the buyer column for the actual project. Give each proposed configuration its own supplier response, including any deviations.
| Decision field | Buyer enters | Supplier returns |
|---|---|---|
| Application and geometry | Task, distances, target dimensions and orientation | Proposed beam setting and any limitations |
| Useful illumination | Agreed target points, requirement and operating times | Available readings or proposed sample procedure |
| Output and intensity claims | Numbers needed for comparison or packaging | Value, mode, timing, method and report identity |
| Power and configuration | Battery preference and required charging workflow | Quoted components and alternative configurations |
| Commercial project | Quantity, market, customization, packaging and timeline | Quote basis, sample plan and deviations |
An alternative is easier to judge when it preserves these fields. If a supplier proposes a different battery or beam arrangement, the reply should explain which requirement changes and why the alternative is worth considering. A larger lumen number, on its own, is not a response to an unanswered coverage requirement.
For illustration, a buyer seeking broad illumination of a panel could receive a higher-output concentrated-beam proposal. The number looks better, yet the centre and edges may no longer be comparable. Procurement needs the target readings before accepting the substitution. The same reasoning applies when a lower price comes with a different included battery.
Keep commercial quantities and timing in the request. They affect the quotation and sample process, even though they do not alter the definitions of lumen or candela. Include customization, packaging and destination market so the supplier knows whether it is discussing a standard platform, a branded variant or a project requiring additional documentation.
Ask the supplier to identify available evidence separately from proposed new work. This keeps the first response manageable and makes any testing cost visible. Procurement can then decide which unanswered question warrants a sample check, which needs formal measurement and which does not affect the purchase.
The illumination threshold belongs to the application owner. This article deliberately supplies no universal minimum. Where a task is governed by an organizational or regulatory requirement, use that requirement with the responsible team. The fictional 5-lux example explains arithmetic; it cannot become the acceptance threshold merely because it appears in a convenient table.
Once the preferred setup is selected, obtain a written configuration confirmation with the quotation. Reconcile it with the comparison matrix before accepting revised pricing. A change in a component, battery or beam setting should be visible at this stage, while there is still time to reassess its effect.
Approve the useful beam and the published claim separately
Sample approval has two related decisions. The first is whether the flashlight works for the intended task. The second is whether the evidence supports the numbers the buyer intends to publish. A successful task trial can answer the first without completing the second.
Start the trial by identifying the sample against the quotation. Record the battery, selected mode and focus position. Check the visible configuration and any identifying labels. A discrepancy should be resolved before the result is treated as approval of the proposed order.
Use the target and distances in the buying brief. Record readings at the important positions and operating times. For a broad target, retain the centre and edge results rather than reducing everything to the brightest point. For a concentrated beam, include the aiming and searching activity that the user will perform.
Keep conditions consistent across samples. A change in distance, background, orientation or timing can alter the comparison. Record unavoidable differences so the review can distinguish a product difference from a test difference. Consistency is especially valuable when the quotations are close and the sample decision carries the final selection.
Measured results and user observations belong beside each other, with different labels. A user may find a glare pattern distracting despite acceptable central illumination. Another may prefer simpler controls even though both beams complete the task. These observations add purchasing value, but they are not substitutes for luminous-flux or intensity measurements.
Where the intended workflow includes mounting, gloves or frequent focus adjustment, include those actions in the trial. A magnetic-tail platform positioned on equipment is not being used in the same geometry as a handheld light pointed at a wall. The approval record needs to describe the arrangement that succeeded.
For an extended operating requirement, track illumination through the agreed period. Initial readings alone cannot show whether a sample meets a later acceptance point. The task requirement may be expressed as useful light throughout a session; the published runtime may use a different endpoint. Retaining both records avoids confusion when the sample is discussed with marketing or a distributor.
Packaging approval requires its own evidence check. Every stated output, intensity or distance should be tied to the approved configuration and an identified basis. A catalog distance without method details can remain under review while the application trial proceeds. It should not acquire an FL 1 label through inference.
After selection, retain the reference sample and its record. Identify the revisions and substitutions that trigger notification or new evidence. Changes to the emitter, driver, optic or battery can matter to the approved performance, even when the product name remains the same.
Production checks need an agreed scope. Sample measurements, routine inspections and individual-unit testing are different activities. The order documentation should make clear which checks are performed and how exceptions are handled. A sample report should not be described as proof that every production unit receives the same optical measurement.
Finally, reconcile the packaging, distributor sheet and product listing. They should describe the same supplied configuration. Keep the substantiation file behind the approved values so a later reorder or revision has a clear starting point. This is how the procurement decision survives beyond the first sample discussion.
FAQ
1. Is higher candela always better than higher lumens?
No. Higher intensity toward a distant target can be valuable, while a nearby work area may benefit more from broad coverage. Compare the task, beam width and operating period. Neither metric supplies a universal ranking of flashlight quality.
2. Can a supplier convert lumens to candela without testing?
A meaningful calculation requires the angular light distribution. There is no generic conversion factor for arbitrary flashlights. Obtain the calculation basis and distinguish an estimate from a measured result when completing the specification.
3. Does a listed 300-metre beam distance prove useful inspection at 300 metres?
No. Establish the threshold, mode and evidence behind the number. Inspection depends on the target and viewing conditions; it needs its own acceptance requirement. A defined comparison distance is not a guarantee of reading a particular label or seeing a defect.
4. Should a buyer request both lumens and candela?
Both are useful for comparing total output and concentration. Add coverage and operating-time evidence where those affect the task. A missing value remains an open question rather than a reason to insert an unsupported estimate.
5. What if two reports use different measurement times?
They describe different points in operation. Obtain the mode and timing basis, including whether either figure represents SDEB. Until matched information is available, keep the two results separate and avoid treating their difference as a product ranking.
6. Can I compare runtime directly with the advertised maximum output?
Only after establishing the operating mode and endpoint. The maximum need not remain constant for the reported runtime. An output curve or time-stamped readings show when the light falls below the application requirement.
7. Are beam photographs enough for sample approval?
They document appearance, with exposure and scene conditions affecting the result. Combine matched photographs with target readings and the actual task trial. A photograph does not substantiate precise output, intensity or coverage illumination.
8. What extra information is needed for an adjustable-focus light?
Record the focus position for each performance value and a repeatable position for evaluation. Test the settings used in the intended workflow. The largest output and largest intensity may not occur at the same setting.
9. Does a Type-C port or named LED establish beam performance?
No. These are configuration details. The assembled optics, power arrangement and operating conditions still require relevant evidence. Retain the details to identify the product without treating them as a measured beam specification.
10. What should an RFQ include before asking for brightness advice?
Give the application, distances, coverage, preferred beam, mode and duration, battery arrangement, quantity, market and timeline. Request a confirmed configuration, available reports, proposed sample checks and a clear list of deviations or missing data.
Move from headline numbers to an answerable quotation
The best lumens vs candela flashlight proposal explains why its beam fits the buying brief. Send Brightenlux the target geometry and operating requirement, then request the configuration and evidence needed to compare total output, concentration and useful illumination. The response should make the remaining questions visible before the order is approved.
Send your application and request sample evidence
Include application, normal and maximum distances, beam or target dimensions, output mode and duration, battery preference, quantity, destination market and timeline. Specify the sample evidence needed for the purchasing decision.